Ultimate Guide: Camera Settings for Night Sky Photography
Thursday 07 November 2024
 2.0k
2.0k
 Reproduction without the author's authorization is prohibited
Night sky photography is an exciting challenge that offers endless possibilities for creativity. If you're just starting out, it might feel a bit overwhelming, but once you understand the basic settings and equipment, you'll be well on your way to capturing the stunning beauty of the stars. Whether you're looking to photograph the Milky Way, star clusters, or star trails, the right approach will help you create images that truly stand out.
Before you get into the technical side of things, it's important to first consider what kind of night sky photo you're hoping to capture. Are you interested in shooting sharp, clear stars, or would you prefer long star trails that show the movement of the night sky? Deciding on the type of image you want to achieve will guide your camera settings and composition.

Image source: https://unsplash.com/
Choosing the Right Lens
The lens you use for night sky photography plays a critical role in the outcome of your shots. A wide-angle lens is ideal for capturing large sections of the sky, making it easier to photograph expansive star fields or the Milky Way. When selecting a lens, look for one with a wide aperture—around f/2.8 or lower. A larger aperture allows more light to enter your camera, which is especially important when shooting in low-light conditions like at night.
A wide-angle lens with a fast aperture minimizes distortion and allows for clearer, sharper stars. Lenses in the 14mm to 24mm range are often favored by night photographers, especially when shooting on full-frame cameras. A wide aperture also helps gather enough light to properly expose the stars, which would otherwise be too faint in a dark sky.
Find a Location with Low Light Pollution
When it comes to photographing the night sky, the less artificial light you have in your environment, the better. Light pollution from streetlights, city glow, or other sources can wash out the stars and compromise the quality of your images. To achieve clear, sharp stars, it’s essential to find a location far from light pollution.
A darker environment gives your camera the best chance to capture the details of the night sky, and it will also make the stars appear brighter and more distinct. Consider traveling to rural areas or national parks, or even remote mountain locations. With less light pollution, you'll be able to take in the full beauty of the night sky.
Set Your ISO to a Low Setting
ISO determines how sensitive your camera’s sensor is to light. When shooting at night, you'll want to keep your ISO low to reduce the risk of noise (the grainy effect that appears in low-light images). A setting around ISO 800 is generally recommended, but it may vary depending on your camera’s capabilities. Some cameras perform well at higher ISO settings, but it’s still a good idea to keep it as low as possible.
A lower ISO will help you capture a cleaner image with more detail in the stars, without introducing distracting noise. Keep in mind that if you set your ISO too low, you may end up with underexposed images, so balancing it with other settings, such as aperture and exposure time, is important.
Use a Wide Aperture for Maximum Light Capture
A wide aperture is key to getting bright, clear stars in your images. The wider the aperture (lower f-number), the more light can enter your camera. This is especially important when shooting in low light, as it allows your camera to gather enough light to expose the stars properly.
If your aperture is too small (i.e., using a higher f-number), you risk underexposing the stars, making them difficult to see clearly in the final shot. For night sky photography, an aperture of f/2.8 or wider is typically best for capturing the details of distant stars or galaxies.
Long Exposure for Clear Stars or Star Trails
Image source: https://unsplash.com/
One of the most important aspects of night sky photography is the exposure time. Stars are faint, so you need to keep your shutter open for a longer period to allow your camera to capture enough light from them. The ideal exposure time will depend on the type of photograph you're going for.
If you want to photograph clear, sharp stars, aim for an exposure time between 10 and 20 seconds. This will allow you to capture the stars without them turning into streaks, which can happen if the exposure is too long. However, if you’re looking to create star trails—the circular patterns that stars make as the Earth rotates—you’ll need to extend your exposure time to several minutes, or use techniques like stacking multiple shorter exposures.
Use a Tripod to Keep Your Camera Stable
Stability is crucial when taking long exposure photos, and a tripod is the best way to ensure your camera stays steady. Even a small amount of camera shake during a long exposure can result in a blurry photo, which is especially noticeable when photographing something as delicate as the stars.
Using a sturdy tripod is essential to prevent any movement of the camera while the shutter is open. Lightweight tripods are great for portability, but they may not be as stable in windy conditions, so make sure the tripod you choose can securely hold your camera for long exposures.
The Carbon Fiber Camera Tripod from K&F CONCEPT strikes a good balance between stability and lightweight, giving you a boost for your night sky photography
FAQs
What is the best ISO setting for night sky photography?
For night sky photography, it’s recommended to use a low ISO, typically around 800 or lower, to minimize noise and maintain the clarity of stars.
What type of lens is ideal for night sky photography?
A wide-angle lens with a large aperture (f/2.8 or wider) is ideal for capturing expansive night skies and allowing more light into the camera sensor.
How long should the exposure time be for clear stars?
For sharp, pinpoint stars, exposure times should generally be between 10 and 20 seconds. Any longer and the stars may begin to streak due to the Earth's rotation.
Why is a tripod essential for night sky photography?
A tripod is crucial because long exposure times require stability. Even the slightest camera shake can cause blurry images, especially when photographing stars.
How do I focus my camera for night sky photography?
Use manual focus and set your lens to infinity, or use live view and zoom in on a distant light to fine-tune focus for sharp stars.
In Conclusion
Night sky photography may seem challenging at first, but with the right equipment and settings, you can start capturing breathtaking images of the stars. Focus on finding a dark location, using a wide lens with a wide aperture, keeping your ISO low, and ensuring your camera is stable with a tripod. With patience and practice, you’ll soon be able to photograph the night sky like a pro.
Statement: all contents and remarks made by K&F CONCEPT 's intranet friends only represent themselves and do not reflect any K&F CONCEPT 's opinions and views.
-
 OM System to Develop Lenses for Landscape PhotographyThursday 11 September 2025
 -
 Canon Cinema EOS C50 Launch PreviewTuesday 09 September 2025
 -
 Is the Canon IXUS series about to be reborn?Monday 08 September 2025
 -
 Sigma will release three lenses on September 9th, and their appearances have been revealed!Thursday 04 September 2025
 -
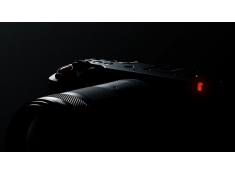 Canon Cinema EOS C50Tuesday 02 September 2025


